Chat
The Chat panel is the primary interface for working with the AI. It shows your full conversation history and provides the prompt box for sending messages.
The Chat panel is the primary interface for working with the AI. It shows your full conversation history and provides the prompt box for sending messages.
Chat Threads
Each project can have multiple Chat threads. The current thread's name appears at the top of the Chat panel. Click it to open a dropdown listing all threads, with timestamps showing when each was last active.
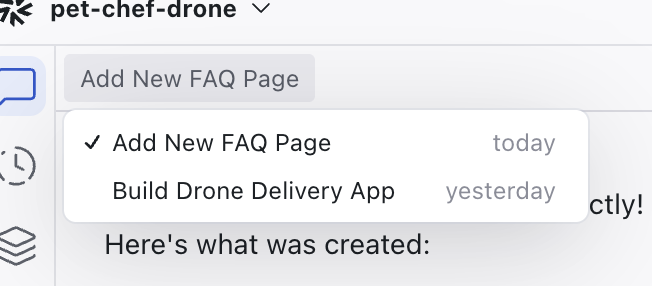
- Click Start new chat (the + button) to create a fresh thread with no prior context
- Click any thread in the dropdown to switch to it
Starting a new thread is useful when you want to change direction without the AI being influenced by earlier conversation. Previous threads are preserved — switch back any time you need the context from an earlier conversation.
Conversation History
Messages are displayed chronologically within the active thread. Each message shows:
- User messages — your icon, name, and timestamp
- AI responses — timestamp, model icon, and token cost (credits consumed)
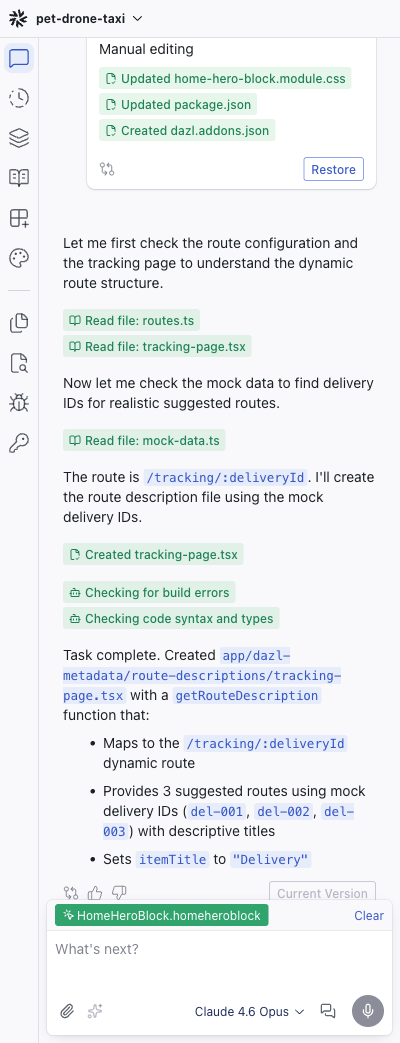
AI responses can include formatted text (headings, lists, code blocks), file edit cards, action cards, generated or edited images, and file count summaries. The AI can also inspect your project while working — reading logs, computed styles, and page HTML, and taking screenshots of the live project to verify its changes visually. See Chat-Driven Editing for details on response types.
When collaborators are working on the same project, a typing indicator appears in the Chat panel showing who is composing a message.
Prompt Box
Located at the bottom of the Chat panel:

| Control | Description |
|---|---|
| Text input | Multiline field with "What's next?" placeholder. Pasting large text (such as PRDs or code snippets) automatically attaches it as a file instead of inserting raw text. |
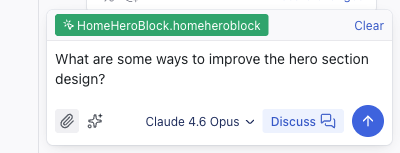
| Element attachment | When an element or JSX expression is selected in Edit mode, it appears as a chip with the component name. JSX expressions can be attached as context just like any other component or element. |
| Clear | Removes the attached element |
| Attachment button | Paperclip icon — attach files or images. You can also drag files and folders from the Files panel or Add Panel directly into the chat input. |
| Send button | Submit the prompt (disabled when empty) |
| Model selector | Choose the AI model for this message |
| Discuss | Toggle discuss mode — the AI responds conversationally without modifying code |
| MCP toggles | Opens a popover listing connected MCP servers with on/off toggles so you can enable or disable them without leaving the chat. |
| Screen share | Share screen context with the AI |
| Voice input | Microphone for speech-to-text |
When a code editor or spec editor tab is active, the Chat panel automatically attaches that file as context so the AI stays focused on what you're working on.
Queuing Tasks
You can send additional prompts while the AI is still working. Queued prompts appear as a "Tasks pending" list above the prompt box and run in order automatically once the current task finishes.
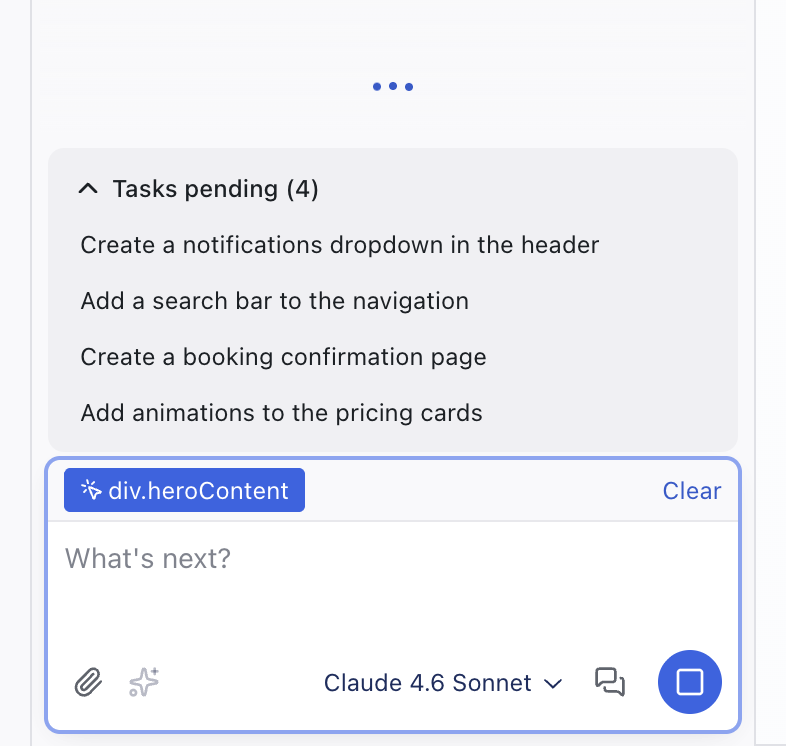
This lets you line up a sequence of changes without waiting between each one — describe the next step as soon as you think of it.
Canceling an Operation
If the AI is heading in the wrong direction, cancel the current operation. All file changes made so far are preserved, so you can continue from where the AI left off or prompt differently.
Discuss Mode
The Discuss button toggles discuss mode. When active, the AI answers questions and talks through ideas without making changes to your project's code.
Use it to brainstorm features, plan an approach, or ask the AI about how your project works — why a component behaves a certain way, what a piece of code does, or how things are connected. You can also ask the AI about Dazl's own capabilities — what features are available, how to use a specific tool, or what's possible in the platform. Toggle it off when you're ready for the AI to start making changes again.
Model Selector
The Model selector below the prompt box lets you choose which AI model processes your next message. Click the model name to open the dropdown and select a different one.
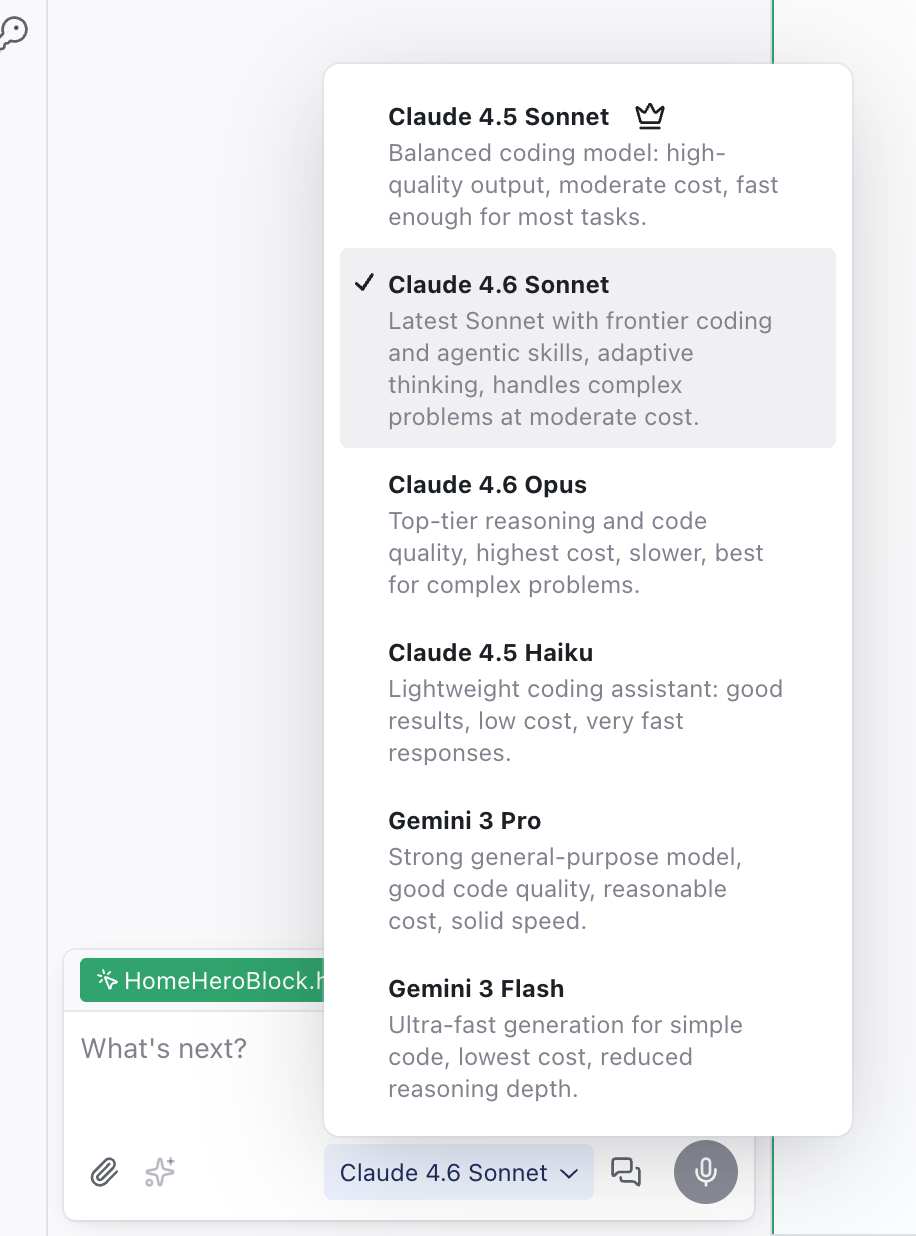
| Model | Description |
|---|---|
| Claude 4.6 Sonnet (default) | Balanced coding model – high-quality output, moderate cost, fast enough for most tasks |
| Claude 4.6 Opus | Top-tier reasoning and code quality – highest cost, slower, best for complex problems |
| Claude 4.5 Haiku | Lightweight coding assistant – good results, low cost, very fast responses |
| Gemini 3.1 Pro | High-tier reasoning and code synthesis – solves complex patterns efficiently, moderate cost |
| Gemini 3 Flash | Ultra-fast generation for simple code – lowest cost, reduced reasoning depth |
There's no single best model — it depends on the task:
- Starting a new project — Claude 4.6 Sonnet is a good default. It balances quality and cost well for initial generation.
- Complex logic or architecture decisions — Claude 4.6 Opus excels at reasoning through complex problems, though it takes longer and costs more.
- Quick tweaks and routine changes — Claude 4.5 Haiku or Gemini 3 Flash handle routine modifications quickly and cheaply.
- Design exploration — Gemini 3.1 Pro handles complex patterns efficiently. Use it when you want to explore different visual directions.
- Trying a different perspective — if one model isn't giving you the results you want, try a different one. Each model has different strengths.
You can switch models mid-conversation. Use a capable model for the initial structure, then switch to a lighter model for smaller refinements.
Each model consumes credits at a different rate. The token cost of each AI response is displayed next to the model icon. Lighter models (Haiku, Flash) consume fewer credits per interaction than heavier models (Opus). Visual editing, inspecting, and browsing your project don't consume credits — only AI-generated changes do.
Chat Overlay
When you switch to another sidebar panel (History, Elements, Specs, etc.), the Chat panel stays available as a collapsible overlay at the bottom of the sidebar. This lets you keep your conversation visible while working in other panels.

The divider between the active panel and the Chat panel has two controls: click the up arrow to give the Chat panel the full sidebar height (collapsing the panel above), or the down arrow to collapse the chat and give the active panel more room. Click See Chat at the bottom to expand it again.
Message Actions
Each AI response has:
- Helpful / Not helpful — thumbs up/down feedback buttons
- View Code — opens a diff showing the changes made by that response
- Restore — rolls back the project to the state after that response
- Current Version badge — marks the response that matches the current project state
Related Articles
- Chat-Driven Editing – how to work effectively with the AI
- Skills – domain-specific AI knowledge files
- Upgrading to Pro – get more credits
Visual Editing
Visual editing lets you select and modify elements directly on the live preview — no prompts, no code, no credits. Use the Edit / Preview toggle in the top bar to switch between modes.
AI Buttons
Save reusable AI prompts as buttons that you can trigger from the action bar or the right-click context menu.